
Easy Cast on Stitches for Every Knitting Project
The first blog post in my Knitting for Beginner series only makes sense if we talk about how to start a knitting project. There are 2 very easy methods on how to cast on stitches for knitting.
Picking out your knitting needles and yarn for your project is important. If you’re unsure about your what needles to pick or yarn, I suggest looking into my 2 blog posts about needles & yarn.
Related Blog Posts: Everything you need to know about knitting needles, A complete guide to yarn weights & yarn types
Alright, let’s learn these easy to cast on stitches to start our project!
Cast on Knitting Stitches
There are lots of different ways that you can cast on stitches. I’m going to show the most basic ways you can cast on your stitches. Different projects may call for different cast on methods as each has different elements to them for the structure of the project.
How to Create a Slip Knot
We need to first learn how to create a slip knot to cast on the stitches.
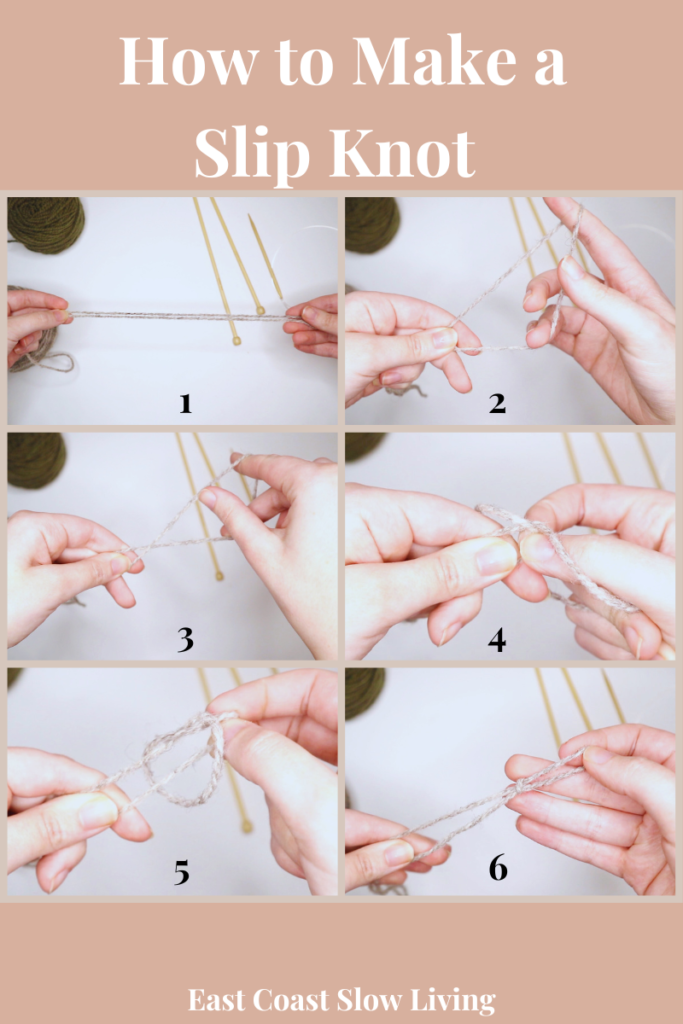
- Take some yarn in your hand and fold the yarn in half. One half of the yarn is coming from your working yarn (the yarn you are knitting from). The other half is the tail (the extra part that just kinda hangs there).
- Grab both pieces of yarn in one hand (my left hand) and with your other hand, insert your fingers into the loop to create a triangle.
- Once the triangle is created turn your fingers on your right hand. By doing so, you will cross over the two strings of yarn and create an X. The yarn that is coming from the tail end of your yarn (the stuff we aren’t knitting) should be above the yarn coming from the working yarn.
- We are then going to grab the tail end of the yarn right before the yarn crosses over (the yarn closest to your fingers).
- From there, pull the yarn through the loop.
- You now have a slip knot! Place that on your needles, and you are ready to go.
How to do the knitted cast on
By far I think the easiest method to cast on knitting stitches is by doing the knitted cast on. This cast on is often the very first cast on anyone learns when they begin their knitting journey. I learned to knit as a child, and this is how my grandmother taught me how to cast on.
A knitted cast on tends to be tight. Therefore, any project that doesn’t require stretch can be started with the knitted cast on method. For example, I knit a lot of home products like dishcloths. For dishcloths, I use the knitted cast on method to start the project.
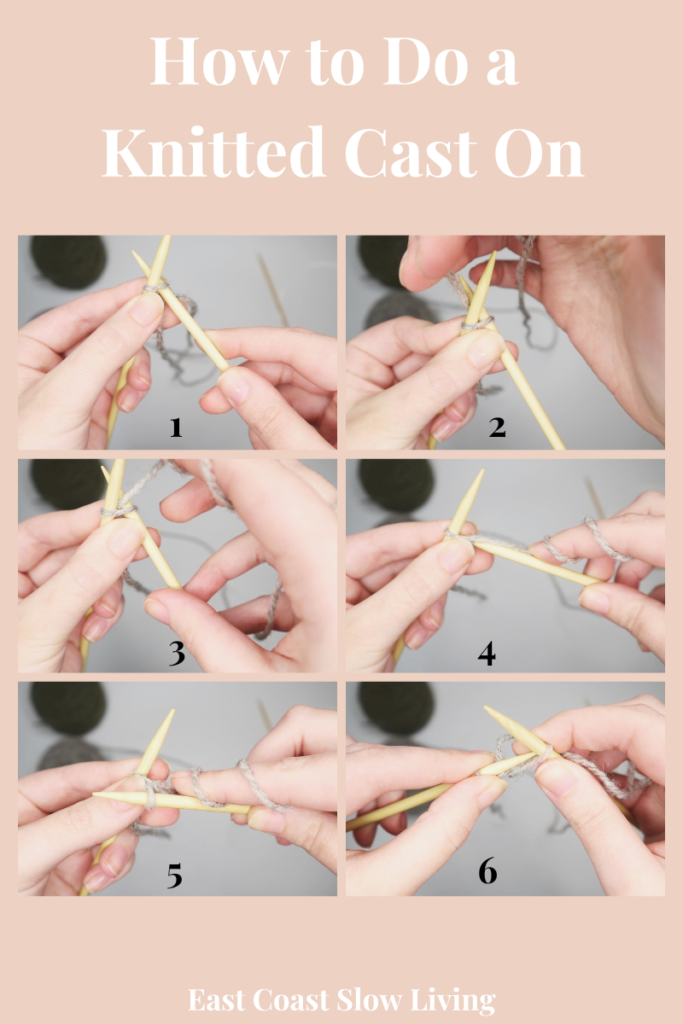
- In your hands, you have 2 needles. In your left hand, is the needle that is holding the slip knot we created. The other needle is empty. To start casting on, we need to take the right needle with nothing on it and insert it into the back of the loop on the left needle from bottom to top.
- After inserting the needle into the loop, we are then taking the working yarn and wrapping is around the right needle. The yarn should be coming from the back and brought in front of the right needle.
- Pull the yarn down so that it is right in between the two needles.
- Taking the needle in our right hand, we are going to pull the needle down, grabbing the yarn that we just wrapped around the needles.
- Pull the yarn down and through the loop. You should now have a loop on each needle and it should look like an 8.
- From there, take the loop that is on your right needle and slip it (or place it) on the left needle. You have now successfully cast on your first stitch via the knitted cast on method!
How to do a long tail cast on
A long tail cast on is my favourite way to cast on stitches. With the long tail cast on, you create a stretchy hem so the cast on is perfect for items that need stretch like hats, sweaters, socks etc. There are plenty of other cast on methods that offer a stretchy hem, however, I find that the long tail cast on is the easiest.
Once you get more practice with this cast on, it becomes very easy and quick.
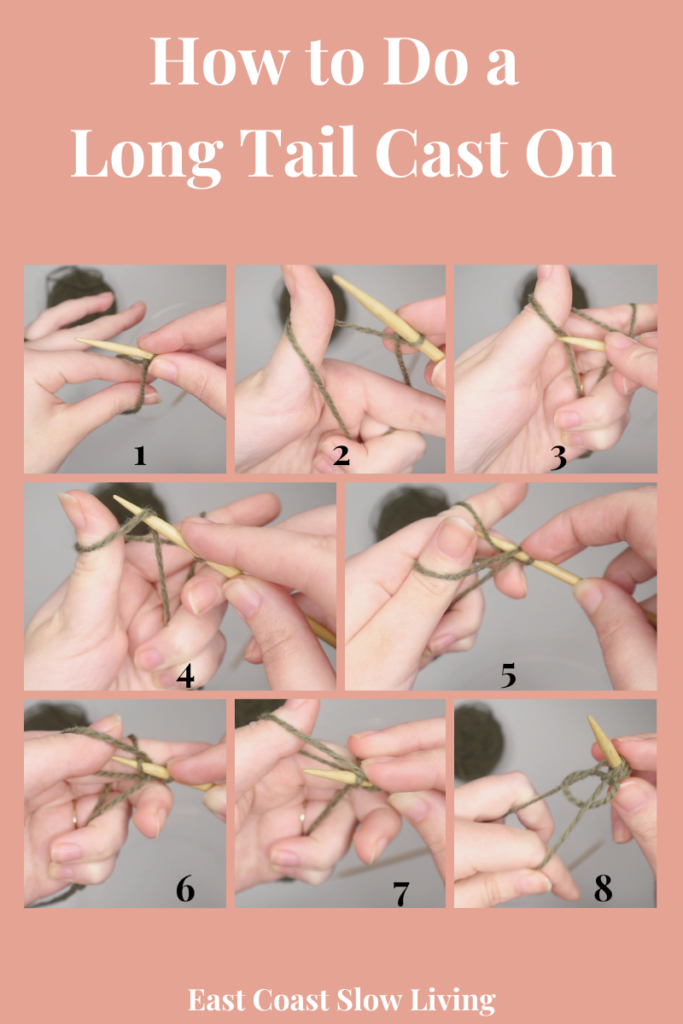
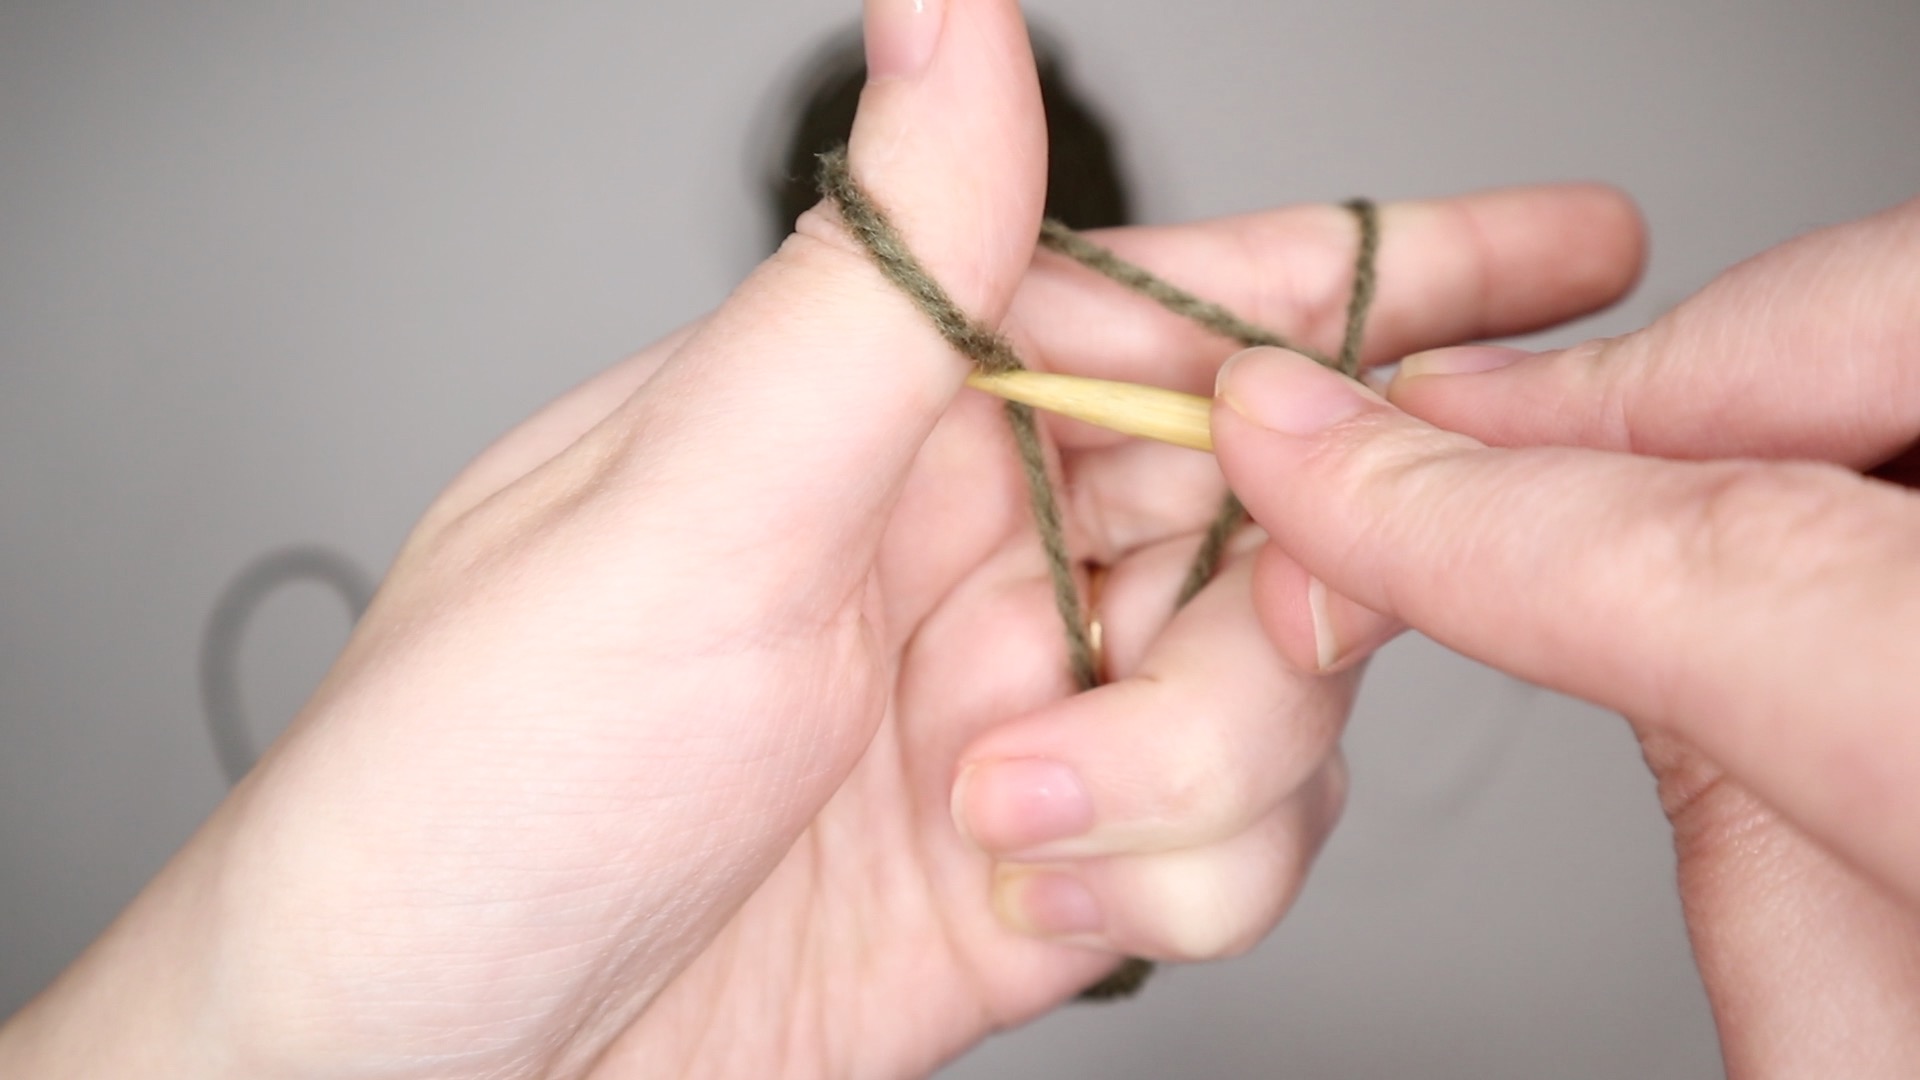
- In this cast on method, we are only using one needle and our hand. With the slip knot on the right needle, ensuring that the tail end is in the front and the working yarn is in the back, place your thumb and index finger between the 2 pieces of yarn.
- Grab the 2 pieces of yarn with your 3 remaining fingers on your left hand. Then, stretch your thumb and index finger, pulling on the yarn like in the 2nd image.
- Taking your needle, you are going to go over the yarn that is wrapped around your thumb.
- Go under that piece of yarn, and grab it with the needle.
- Then, taking the yarn that is wrapped behind your thumb and coming from the knitting needle, take your needle and go from the back to front of the yarn.
- We are then going to grab the yarn with our needle.
- Pull that yarn that is on your needle, through the loop that is coming from your thumb.
- From there, release the loop on your thumb, and pull on the yarn that is both the working yarn and the tail yarn. You have no successfully casted on your first knit stitch via the long tail cast on method.
Time to knit!
Now you know 2 easy cast on methods and are able to start any knitting project.
Happy knitting
Kate